Planting Dormant Grapevines (WineMaker)
Establishing a vineyard is an exciting and rewarding adventure. Like all of life’s challenges, your success or failure will be dictated by the amount of research, planning, effort and perseverance you exhibit throughout the process.
If you’ve read my last few articles you know one thing is certain — there’s a lot to do before putting vines into the ground. Your vineyard “system” needs to be in perfect working condition before vines can be planted. You need to install the trellising and install and test the irrigation equipment. The soil needs to be tested. In addition, vineyard pests need to be held in check. Installing a vineyard is not something you do on a whim some weekend.
Before planting a vineyard, it is advisable to talk to a local horticulturist or nurseryman about how grapevines will grow in your specific locale. Ply the local experts with kindness and wine, and ask every question you can come up with. You may also need to ply some friends with beer to get them to help out over the growing season. As my favorite wine-country truism goes, “It takes a lot of beer to make wine.”
Ordering Dormant Vines
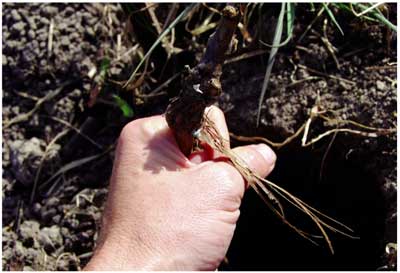
I suggest that you plant dormant grapevines because they establish themselves — start growing and adapting — in the piece of ground where they are going to live permanently. Green-growing grapevines were raised in a sheltered environment and often die in the field from exposure or shock. While many wilted green-growing vines will sprout secondary buds and do fine in the long run, my experience has shown me that dormant vines are clearly the smart choice for planting material.
Purchase dormant vines early to make sure the nursery has the exact materials you are looking for. Ordering early assures you don’t have to settle for “leftovers.” I recommend you order dormant grapevines up to one year before planting. A good grapevine nursery wants to know what their customers need in advance. This knowledge aids them in deciding what scion material — sometimes called clone material — to graft onto rootstock to prepare orders. Vines that are going to be planted in an area with known soil pests, such as nematodes or phylloxera, are commonly planted on hardy, disease-resistant rootstocks. These rootstocks are bred from native vines, which are resistant to American soil pests. Call a good nursery at least a few months before spring and let them know how many vines you will need. Be sure to specify that you want to purchase dormant grapevines. Make sure the type (cultivar) of vines you order —Norton, Chardonnay, Merlot or whatever variety you choose — are appropriate for your climate and vineyard.
Order ten percent more vines than you think you will need. The extras will come in handy in case you need a few extra or miscounted. It’s easy to plant them, according to the directions below — but at two-foot by two-foot spacing, in an out-of-the-way corner of your vineyard. The following year you can dig them up, trim the roots and growth, and use them to replace the vines that didn’t take in the “official” vineyard.
Call the nursery every few months and give them updates on when you’d like the dormant vines taken out of cold storage and delivered. The best time for delivery is usually in the spring after the possibility of hard frosts has passed. Dormant vines are usually dug up deep in dormancy (during the winter), trimmed, and then bundled into 20–25 vine bunches, tied together and bagged. The bags of grapevines are filled with moist wood chips and put in a large wooden crate that is also filled with moist wood chips.
* A percentage of WineMaker’s content is behind a paywall. If you are new to viticulture and/or winemaking, having a subscription for less than $50 annually is paramount. The resources WM provides are unparalleled, providing workshops, conferences, and online archival access to articles.
All geared to the hobbyist!